Monday, December 30, 2013

Raswaley Methi Aloo | Fenugreek Potato Curry
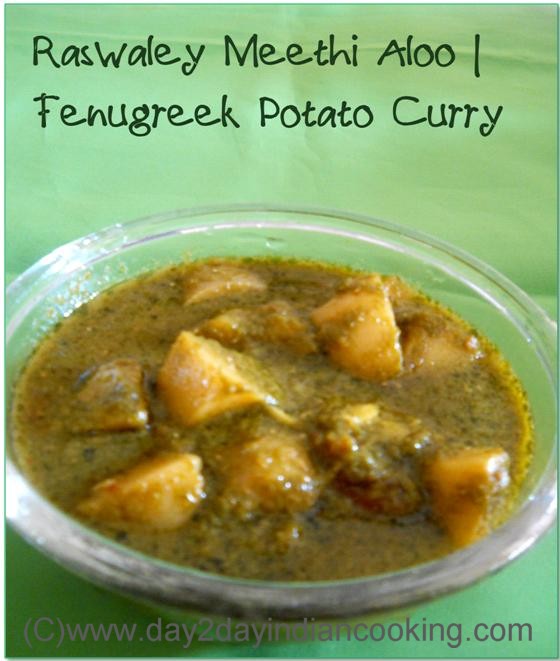
Raswaley Methi Aloo | Fenugreek Potato Curry
recipe of making fenugreek potato curry
Add caption

Winter season of full of green leafy vegetables, fenugreek or methi leaves are easily available in this season. Raswaley Methi Aloo is a traditional sindhi recipe prepared in winter. This is healthy and spicy curry dish usually served with rice, you can have it with roti too.
Feenugreek leaves are grinded to paste and then cooked with potatoes, lots of garlic and other spices.
This recipe is slightly bitter in taste, but healthy like other green leafy vegetables, you can add some spinach leaves while grinding to balance the bitter taste of methi.

Preparation Time : 15 minutes | Cooking Time : 20 mins | Serves :4
Recipe Category: Curry and Gravies | Recipe Cuisine: Indian

Ingredients:

fenugreek or methi leaves-2 cups
potatoes -2
ginger-1”piece
garlic-15-20pods
tomatoes-4
onions-2
green chillies-4-5
salt-to taste
turmeric powder-1/2teaspoon
coriander powder-1 tablespoon
garam masala powder-1/4 teaspoon
oil-2 tablespoon
lemon-1

Method:

  1. clean and wash fenugreek leaves
  2. Roughly chop onion and grind them for 3-4 seconds without adding water.(coarse grinding is required
  3. grind methi leaves with ginger, green chillies and tomatoes to fine paste.
    step one of methi aloo curry
  4. peel and crush garlic pods.
  5. heat oil in a pressure cooker, add onion paste, stirring continuously roast till golden in color, add crushed garlic to it, roast till garlic turns to pinkish in color
  6. Add fenugreek paste to it, stirring continuously roast it on high flame till its color starts to change, your kitchen will filled with aroma of meethi
    step 2 of methi aloo curry
  7. add chopped potatoes, turmeric and coriander powder to it, mix well roast on low flame for 2-3 minutes, add 1 cup of water to it, pressure cook till 3 whistles, first 2 on high flame and last one on low flame.
  8. Let it cool completely, check gravy’s consistency if required boil it for 2-3 minutes.
  9. At the time of serving add garam masala powder lemon juice to it.
In this winter season you can also try methi matar pulao and raswaley gobhi aloo.

Notes:

Proper roasting of methi paste is essential for perfect taste in this recipe, roast for 6-7 minutes till oil separates.
You can prepare this recipe without using onion too, sometimes I do.
Read more

Friday, December 27, 2013

Green Moong Dal Vada | Fiber Rich Recipes

recipe of making green moong dal vada, famous south indian snack

Green Moong Dal Vada | Fiber Rich recipes

Green Moong dal or chilke wali moong dal (along with husk) is rich in fiber and potassium which helps in lower blood pressure, thus including it in my recipe of vada or medu vada which is a south Indian deep fried snack usually made with urad dal and served with chutney or sambhar. This is a light and healthy version of vada made with green gram and require half soaking time.
Shaping Vada is difficult to many of us, but with practice and 2-3 trails you can shape perfect vada . Use less water as you can while grinding green moong dal and adding bread crumbs to the batter will help you shaping vada.
Now coming to the recipe, ingredients required and detailed instructions for the recipe are as follows:

Preparation Time : 4 hours | Cooking Time : 20 mins | Serves :8
Recipe Category: Deep fried Snacks | Recipe Cuisine: South Indian

Ingredients:

Green gram(moong dal)-1 and ½ cups
Ginger-1 inch piece(grated)
Green chillies-4-5
Coridander leaves-1tablespoon
Cumin seeds-1 teaspoon
Hing or asafoetida-1/4 teaspoon
Salt-to taste
Oil-for deep frying

Method:

  1. clean wash and soak moong dal for 4 hours.
  2. Grind dal in grinder without water or use 1 to 2 teaspoons of water
  3. step 1 of making vada with green moong dal
  4. Pour it in a bowl, add grated ginger, chopped green chillies, coriander leaves, cumin seeds, hing and salt to it, mix well and beat it for 2 minutes so that dal become light and fluffy and air is incorporated in it.
  5. If it is difficult for you to shape vada from it, add one tablespoon breadcrumbs or semolina or sooji to it, this will absorb extra moisture.
  6. heat oil in a pan or kadhai, take a small ball of grinded dal in wet hand, dip your thumb in water and make a hole in the center of vada, carefully drop it in oil
    step 2 of moong dal vada
  7. deep fry 3-4 vadas at a time
  8. Prepare all the vadas with the remaining batter.
serve hot with chutney or sambhar

Notes:

First deep fry them on high flame as color start changing to golden, set the flame to medium to low for proper frying .
After shaping one vada clean you hand with kitchen towel before shaping the next one.
Don’t use too much water while shaping, oil may splutter while dropping vada in oil and they will absorb much oil in frying process.
For other deep fried snacks recipes please refer to my post 10 indian deep fried snacks.
Read more

Sunday, December 15, 2013

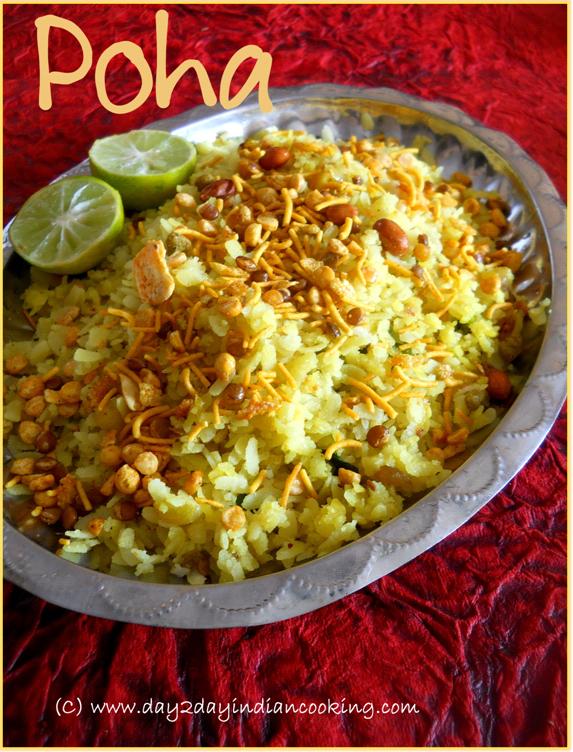
Poha

recipe of making poha with flattened rice

Poha

Poha is a quick and easy snack recipe made with flattened rice. In north India it is served as a breakfast with jalebi. With slight variations in ingredients it is cooked in different forms like: kanda poha, batata poha, lemon poha , matar poha and tamarind poha. It can be prepared as dessert with addition of sugar or jaggary and milk.
Poha is healthy and easy to digest, it doesn’t require any preparations hence you can cook it within minutes. Today I am sharing you my simple recipe of poha made with onions, ingredients require and detailed instructions for the recipe are as follows:

Preparation Time : 5 minutes | Cooking Time : 5 mins | Serves :4
Recipe Category: Breakfast | Recipe Cuisine: North Indian

Ingredients:

Poha or flattened rice- 2 cups
Onion- 1 big
Green chillies-4
Curry leaves-10-12
Mustard seeds-1/2 teaspoon
Red chillipowder-1/4 teaspoo
Turmeric powder-1/2 teaspoon
Salt- to taste Lemon-1
Dalmoth, sev or anyother mixture-1 tablespoon Oil-1 tablespoon
Sugar-optional

Method:

  1. Take poha in a vegetable strainer, wash it thoroughly under running water
  2. Sprinkle turmeric powder over washed poha mix well
  3. Keep aside for 5 minutes 
    step by step instructions of making poha
  4. Chop onion and green chillies
  5. Heat oil in a pan or kadhai, add mustard seeds as they splutter, add chopped onion, green chilies and curry leaves, roast till onions are light pinkish in color.
  6. Add red chili powder , salt and soaked poha mix well, stirring continuously cook for 2 minutes
  7. Garnish it with dalmoth, sugar and lemon juice, serve hot
    recipe of making poha

Notes: Thick poha goes well for this recipe.
I prefer to garnish it with mixture as it includes peanuts, chana dal and sev which gives it a crunch.
Adding sugar is optional, with lemon juice sugar gives it sweet and sour taste.
It is difficult to warm poha, you can do this in microwave or place pan or kadhai in which you cooked poha over a pan in which water is already boiling. It helps poha to keep warm.

Read more

Tuesday, December 10, 2013

20 Microwave Oven Cooking Tips for Indian Kitchen

20 Microwave Oven Cooking Tips for Indian Kitchen
20 tips for using microwave oven in indian kitchen

Written by

Microwave Oven is a very popular kitchen gadget. Today I am sharing 20 Tips related to Microwave Oven cooking for Indian kitchens. Though you can prepare complete meal in Microwave Oven but small tasks can easily be performed with Microwave Oven . Fast, healthy and unsupervised cooking are its key benefits. If you have command over timing and power level adjustments Microwave Oven can be a good companion in kitchen.
Here is a complete list of 20 Tips that you will find useful in your day2day cooking.

  1. Preparing Veggies for Stir Fry
  2. In Indian cooking we serve stir fries as a side dish, their cooking require time and attention, simply place washed veggies in micro safe container, sprinkle some salt over them and micro high them for 3-4 minutes, veggies are ready(you can use potatoes, cauliflower, beans, carrot and ladyfingers etc) Just before serving, heat oil in a pan, add spices and prepared veggies, stir once or twice and side dish is ready to serve.

  3. Extracting Tamarind Pulp:
  4. Tamarind pulp is essential for kadhis, dals and chutney’s it require pre soaking, but in Microwave Oven place washed tamarind with some water Micro high it for 2 minutes, give it standing time, as it cools extract juice from it.

  5. Roasting Papad’s and Snacks
  6. Now a days different types of snacks specially meant for Microwave are available in market, they can be prepared within seconds, simply place them on turntable of Microwave Oven, micro high them for 40-50 seconds you can get oil free snacks ( refer to my post microwave pani poori). Brush papads with some oil and microwave them for seconds, you can prepare fried papads with less oil.

  7. Making Ghee
  8. This is a time taking process when prepared manually, place prepared butter in Micro safe bowl, micro high it for 3-4 minutes, give it standing time, check if ghee it not extracted properly, micro high it for another 1-2 minutes. Don’t try this continuously for 6-8 minutes, ghee will spill out (as continuous cooking raise its temperature)

  9. Roasting Nuts
  10. Peanuts, cashewnuts and other seeds can be easily roasted in Microwave Oven by placing them on turntable and micro high them for 2 minutes, turn once in between, as they cool down they will become crisp and crunchy. Add salt and one teaspoon oil or ghee to 1 cup cashewnuts, mix well and microwave them in the way mentioned above, you will get fried cashewnuts.

  11. Blanching Tomatoes
  12. Blanched tomatoes are required for gravies, pasta and pizza sauce and for soups. Make cross mark on tomatoes with knife, place them in flat dish micro high them for 2 minutes with lid covered, blanched tomatoes are ready.

  13. Steaming Idli and Dhokla
  14. usually steaming idli and dhokla in conventional method requires 12-15 minutes , but in microwave this task if performed within 3 minutes. You can check my jhatpat microwave dhokla with tangy sauce recipe.

  15. Frying edible gum crystals
  16. In winter we prepare healthy recipes like ladoo’s and panjeeri made with gond(edible gum crystals) conventional method required deep frying but in Microwave oven without using oil or ghee you can prepare edible gum crystals within seconds, check my recipes of gond ke ladoo and edible gum crystals panjeeri.

  17. Cooking fruits and vegetables
  18. pears, apples mangoes and gooseberry can be easily cooked in Microwave Oven for making purees and desserts like rabri. I find amla cooking very easy in microwave oven, place washed amla on turntable, microhigh them for 4 minutes, give them standing time, you can easily use them for making murraba (preserve) and chutney (don’t need to soak them overnight in lime water or boiling them). Carrots can also be prepared in the same manner for murrabba.

  19. Making Jams
  20. Preserving fruits like apples and mangoes in the form of Jam require approx 40-45 minutes of cooking but in microwave you can prepare them within 10-12 minutes. For detailed information please check my recipe of mango jam in microwave oven.

  21. Cooking Rice
  22. Cooking daily rice is easy in Microwave Oven , take soaked rice with water(1:2 ratio) microhigh it for 6-7 minutes with lid uncovered, cook for another 2-3 minutes with lid, give it standing time, perfect rice is ready with each and every grain separated.(rice cooking time may vary depending upon the power levels of your Microwave Oven , after 1 or 2 trails you will be able to get exact time for cooking.

  23. Layering Biryani
  24. prepared cooked rice and veggies separately , for biryani just before serving arrange layers of veggies and rice in microsafe cooker, add spices and flavors microwave them on 60% power level for 3-4 minutes, biryani is ready to serve.

  25. Roasting Eggplant for Bharta
  26. On gas stove you can roast one eggplant at a time, but in Microwave Oven you can roast 4-5 eggplants simultaneously by placing them on turntable of microwave oven and microhigh them for 4 minutes. After cooling its peeling is difficult hence suggesting that each eggplant should be cooked on high flame for less than a minute on gas stove, its skin will burnt and you can easily peel it, as it is already cooked in Microwave Oven , don’t require much time.

  27. Extracting Juice
  28. It is very easy, place half cut lemons on turntable of Microwave Oven , micro high them for 10 seconds, you can extract maximum amount of juice from lemons with less effort. This is helpful when you need lemon juice for making lemon drinks or pickles. In the same way juice of mausambi can be extracted without using juicer.

  29. Preparing Potatoes and sweet potatoes
  30. For aloo chaat and kand ki chaat you can prepare potatoes in Microwave Oven , as these recipes require half cooked potatoes, wash them and place them on turntable, micro high them for 5-6 minutes, you can get these veggies ready for deep frying.

  31. Making batter for Khandvi
  32. You can also prepare batter for khandvi in Microwave Oven mix curd, ginger, besan, turmeric and salt with water, place them in Micro safe bowl, micro high them for 3-4 minutes, set the power levels to 60%, microwave them for another 1-2 minutes, check the batter by spreading it on the back side of thali, if it is prepared you can easily roll khandvi out of this, else give another minute of cooking. Don’t give it standing time, remove at once from oven in order to prevent over cooking.

  33. Roasting Khoya
  34. Indian desserts are incomplete without khoya, its roasting require continuous stirring and time but in Microwave Oven it is easy, place it in bowl, micro high it for 4-5 minutes, stir twice in between, khoya is prepared.

  35. Setting Curd and Fermenting batters
  36. In winters setting curd is difficult task, start empty Microwave Oven on high for 30 seconds, switch off it, place container in it, warmth in oven will help in setting curd. The same process can be adopted for fermentation of batter.

  37. Preparing beetroots
  38. Beets are hard and required lots of time in boiling, in order to prepare them for salads and beetroot tikki, Micro high them for 6-8 minutes by placing them on turntable.

  39. Drying green leafy Vegetables and spices
  40. Coriander, methi(fenugreek) and mint leaves can be easily dried and stored for further use. In conventional drying lots of dust and other impurities are incorporated to them and their color is also distorted , but in Microwave Oven it is easy and their natural green color is retained after drying. Wash greens, let them air dry for 8-10 minutes, place them on turntable of microwave oven, micro high them for 2-3 minutes, give them standing time for 5 minutes, After cooling they will become crisp and dry. Veggies should be dry before placing them on turntable else cooking will start and they will require more time to dry. Dry spices like coriander seeds, red chilies, cloves and other spices can be easily dry roasted im Microwave Oven , after this their grinding become easy.

Notes: 

Time mentioned in these tips may vary depending upon the power levels of your Microwave Oven
After 1-2 trials you will be able to get the exact timings according to your oven (My oven’s highest power level is 850 watts.)
If you find these tips useful please share them on your social networking sites.
Read more

Tuesday, December 3, 2013

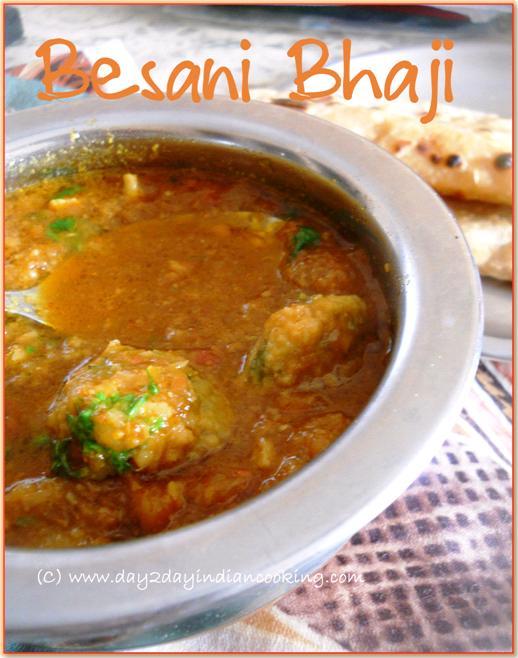
Besani Bhaji | Step by Step Recipe

Besani Bhaji Step By Step Recipe
recipe of making besani bhaji

2 Dec 2012
Besani Bhaji is a traditional sindhi recipe made from bengal gram flour. This is onion and tomato based gravy dish served with roti.
Besani Bhaji is very similar to rajasthani gattey curry. Bengal gram flour is kneaded along with fenugreek and dill leaves(in summer when fresh leaves are not available we prefer to replace them with poppy seeds), oil and some other spices to stiff dough, which is further divided into small portions and shaped in small balls(gattey). Gattey can be deep fried or directly boiled in gravy. In this recipe I am directly boiling them in gravy.
Ingredients required and detailed instructions for the recipe are as follows:


Preparation Time : 15 minutes | Cooking Time : 30 minutes | Serves :4
Recipe Category: Gravy Dishes | Recipe Cuisine: Indian

Ingredients:

For gattey
Bengal gram flour-1 cup
Fenugreek and dill leaves-1/2 cup chopped
Salt-to taste
Oil-2 tablespoon
Red chillipowder-1/4 teaspoon
Turmeric powder-1/4 teaspoon
Roasted cumin powder-1 teaspoon
Sodium bicarbonate or baking soda-2 pinches
Water-as required
For Gravy
Onion-2
Tomatoes-4-5
Green chillies-4-5
Ginger-1”piece
Garlic pods-10-12
Red chillipowder-1/4 teaspoon
Coriander powder-1 tablespoon
Turmeric powder-1/2 teaspoon
Salt-to taste
Oil-1 and ½ tablespoon
Garam masala powder-1/4 teaspoon
Water-2 cups

Step by step instructions of making Besani Bhaji

  1. Roughly chop onions, grind them in grinder for few seconds, it’s consistency should be thick.
  2. Peel and crush garlic pods.
  3. Grind tomatoes, green chillies and ginger to puree.
  4. In a bowl mix Bengal gram flour, oil, salt, red chili powder, roasted cumin powder, turmeric powder and baking soda, mix well and knead to stiff dough by adding water as required.
  5. Divide this dough in equal parts and make small balls of it(refer to image)
    step 1 of making besani bhaji
  6. Heat oil in a heavy bottomed pan, fry onion paste till golden in color, add crushed garlic as it turns to pinkish in color, add red chili powder and tomato paste, roast it for few seconds
    step 2 of besani bhaji recipe
  7. Add the remaining spices(except garam masala powder), roast for 2-3 minutes till oil separates.
  8. Add 2 cups of water to it and bring it to boil, as it starts boiling add bengal gram balls to it, adjust the flame to low, let it cook for 15-20 minutes.
    step 3 of besani bhaji recipe
  9. Balls will float to top as they will cook and gravy will thicken.
  10. Sprinkle garam masala powder over it.
    step 4 of besani bhaji
Besani bhaji is ready to serve with roti, nothing else is required with this recipe.
Notes:
  • You can deep fry these balls too, before adding them to boiling gravy.
  • Fenugreek leaves can be replaced with 1 tablespoon poppy seeds.
  • Make small size balls and cook them properly else they will remain uncooked from inside.
  • For a variation along with gattey you can add ½ cup fresh peas in boiling gravy, it tastes good, I do add often.
    Read more

    Sunday, December 1, 2013

    Radish Stir Fry | Healthy Seasonal Recipes

    recipe of making radish stir fry

    Radish Stir Fry| Healthy Seasonal Recipes

    By

    Radish stir fry is a healthy seasonal vegetable, it is served as a side dish and can be prepared within 10 minutes., radish roundels are stir fried along with its leaves some basic spices are used in this stir fry, it is seasoned with lemonjuice. In north india it is commonly known as mooli ki bhujia. Radish stir fry goes well with dal and rice, some people like it with kadhi chawal, you can have this with any gravy dish. I prefer to cook it in Lunch.
    Ingredients required and detailed instructions for the recipe are as follows

    Preparation Time : 5 minutes | Cooking Time : 8 minutes | Serves :2
    Recipe Category: Stir Fry Vegetables | Recipe Cuisine: North Indian

    Ingredients:

    Radish -1
    Radish leaves-1 cup
    Green chillies-2
    Black mustard seeds-1/2 teaspoon
    Turmeric powder-1/4 teaspoon
    Salt-to taste
    cumin seeds-1/4 teaspoon
    Fenugreek seeds-1/4 teaspoon
    Mustard Oil-2 teaspoon

    Method:


    Peel radish and cut it into roundels.
    Roughly chop radish leaves along with their soft stems.
    Soak it in salted water for 5 minutes, wash it thoroughly under running water

    step 1 of recipe of radish stir fry
    In a pan heat oil, add cumin,fenugreek seeds,green chilies and mustard seeds as they crackle add chopped radish along with turmeric powder and salt mix well.
    step-2 of radish stir fry recipe
    Cook it on high flame for 3-4 minutes, you can see radish has released all its moisture, simmer the flame and let it cook for another 5-6 minutes, at this stage you can cover the lid, check radish if there is moisture content in it, let it dry on high flame.
    Radish stir fry is ready, just before serving squeeze lemon juice over it

    Notes:

    Radish leaves and stems give a nice crunch to this side dish and are healthy too, you can also make this recipe without these if you don’t like slightly bitter taste of these.
    It is prepared with mustard oil, you can prepare it with any vegetable oil.
    You can also try some  other stir fry recipes of my blog: beans potato stir fry, amaranth leaves sabzi and aloo parwal

    Read more